Under the hood of the new Azure Portal

20 September 2014 Posted Under: azure [0] comments
 

Damn, we look good.

So - I haven’t been doing much blogging or speaking on WebMatrix or node recently. For the last year and a half, I’ve been part of the team that’s building the new Azure portal - and it’s been quite an experience. A lot has been said about the end to end experience, the integration of Visual Studio Online, and even some of the new services that have been released lately. All of that’s awesome, but it’s not what I want to talk about today. As much as those things are great (and I mean, who doesn’t like the design), the real interesting piece is the underlying architecture. Let’s take a look under the hood of the new Azure portal.

A little history

To understand how the new portal works, you need to know a little about the current management portal. When the current portal was started, there were only a handful of services in Azure. Off of the top of my head, I think they were:

  • Cloud Services
  • Web sites
  • Storage
  • Cache
  • CDN

Out of the gate - this was pretty easy to manage. Most of those teams were all in the same organization at Microsoft, so coordinating releases was feasible. The portal team was a single group that was responsible for delivering the majority of the UI. There was little need to hand off responsibility to the individual experiences to the teams which wrote the services, as it was easier to keep everything in house. There is a single ASP.NET MVC application, which contains all of the CSS, JavaScript, and shared widgets used throughout the app.
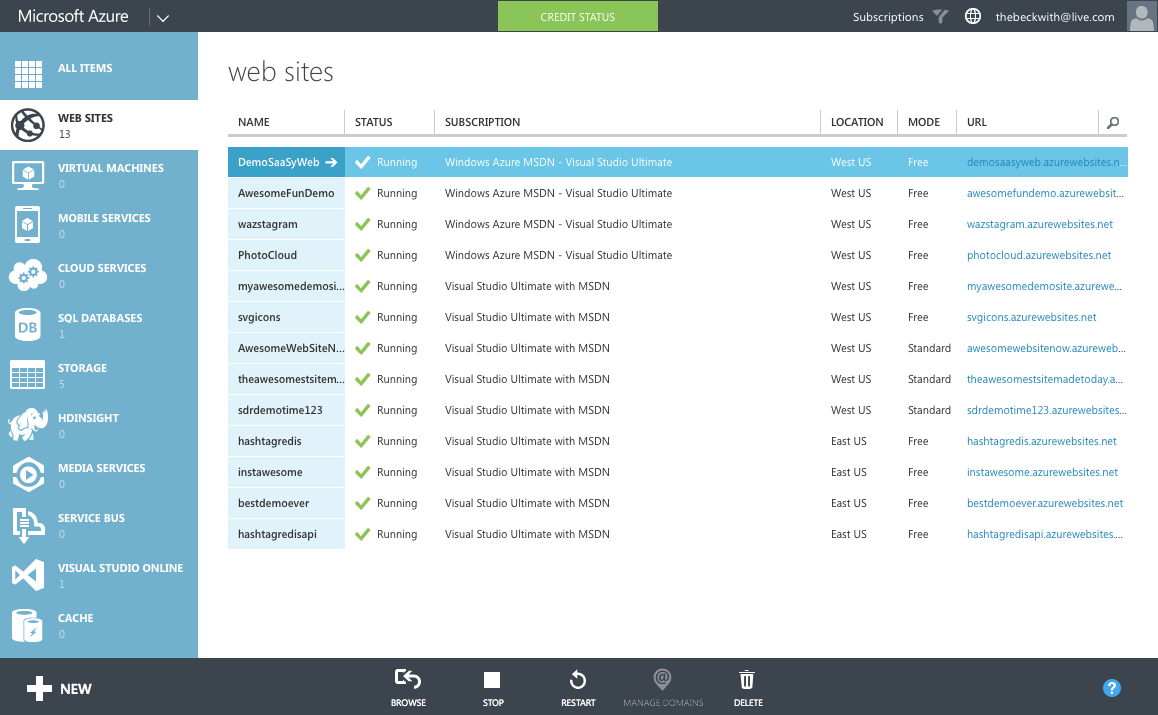
The current Azure portal, in all of it's blue glory

The team shipped every 3 weeks, tightly coordinating the schedule with each service team. It works … pretty much as one would expect a web application to work.

And then everything went crazy.

As we started ramping up the number of services in Azure, it became infeasible for one team to write all of the UI. The teams which owned the service were now responsible (mostly) for writing their own UI, inside of the portal source repository. This had the benefit of allowing individual teams to control their own destiny. However - it now mean that we had hundreds of developers all writing code in the same repository. A change made to the SQL Server management experience could break the Azure Web Sites experience. A change to a CSS file by a developer working on virtual machines could break the experience in storage. Coordinating the 3 week ship schedule became really hard. The team was tracking dependencies across multiple organizations, the underlying REST APIs that powered the experiences, and the release cadence of ~40 teams across the company that were delivering cloud services.

Scaling to ∞ services

Given the difficulties of the engineering and ship processes with the current portal, scaling to 200 different services didn’t seem like a great idea with the current infrastructure. The next time around, we took a different approach.

The new portal is designed like an operating system. It provides a set of UI widgets, a navigation framework, data management APIs, and other various services one would expect to find with any UI framework. The portal team is responsible for building the operating system (or the shell, as we like to call it), and for the overall health of the portal.

Sandboxing in the browser

To claim we’re an OS, we had to build a sandboxing model. One badly behaving application shouldn’t have the ability to bring down the whole OS. In addition to that - an application shouldn’t be able to grab data from another, unless by an approved mechanism. JavaScript by default doesn’t really lend itself well to this kind of isolation - most web developers are used to picking up something like jQuery, and directly working against the DOM. This wasn’t going to work if we wanted to protect the OS against badly behaving (or even malicious) code.

To get around this, each new service in Azure builds what we call an ‘extension’. It’s pretty much an application to our operating system. It runs in isolation, inside of an IFRAME. When the portal loads, we inject some bootstrapping scripts into each IFRAME at runtime. Those scripts provide the structured API extensions use to communicate with the shell. This API includes things like:

  • Defining parts, blades, and commands
  • Customizing the UI of parts
  • Binding data into UI elements
  • Sending notifications

The most important aspect is that the extension developer doesn’t get to run arbitrary JavaScript in the portal’s window. They can only run script in their IFRAME - which does not project UI. If an extension starts to fault - we can shut it down before it damages the broader system. We spent some time looking into web workers - but found some reliability problems when using > 20 of them at the same time. We’ll probably end up back there at some point.

Distributed continuous deployment

In this model, each extension is essentially it’s own web application. Each service hosts their own extension, which is pulled into the shell at runtime. The various UI services of Azure aren’t composed until they are loaded in the browser. This lets us do some really cool stuff. At any given point, a separate experience in the portal (for example, Azure Websites) can choose to deploy an extension that affects only their UI - completely independent of the rest of the portal.

IFRAMEs are not used to render the UI - that’s all done in the core frame. The IFRAME is only used to automate the JavaScript APIs that communicate over window.postMessage().

Each extension is loaded into the shell at runtime from their own back end

This architecture allows us to scale to ∞ deployments in a given day. If the media services team wants to roll out a new feature on a Tuesday, but the storage team isn’t ready with updates they’re planning - that’s fine. They can each deploy their own changes as needed, without affecting the rest of the portal.

Stuff we’re using

Once you start poking around, you’ll notice the portal is big single page application. That came with a lot of challenges - here are some of the technologies we’re using to solve them.

TypeScript

Like any single page app, the portal runs a lot of JavaScript. We have a ton of APIs that run internal to the shell, and APIs that are exposed for extension authors across Microsoft. To support our enormous codebase, and the many teams using our SDK to build portal experiences, we chose to use TypeScript.

  • TypeScript compiles into JavaScript. There’s no runtime VM, or plug-ins required.
  • The tooling is awesome. Visual Studio gives us (and partner teams) IntelliSense and compile time validation.
  • Generating interfaces for partners is really easy. We distribute d.ts files which partners use to program against our APIs.
  • There’s great integration for using AMD module loading. This is critical to us for productivity and performance reasons. (more on this in another post).
  • JavaScript is valid TypeScript - so the learning curve isn’t so high. The syntax is also largely forward looking to ES6, so we’re actually getting a jump on some new concepts.

Less

Visually, there’s a lot going on inside of the portal. To help organize our CSS, and promote usability, we’ve adopted {LESS}. Less does a couple of cool things for us:

  • We can create variables for colors. We have a pre-defined color palette - less makes it easy to define those up front, and re-use the same colors throughout our style sheets.
  • The tooling is awesome. Similar to TypeScript, Visual Studio has great Less support with full IntelliSense and validation.
  • It made theming easier.

The dark theme of the portal was much easier to make using less

Knockout

With the new design, we were really going for a ‘live tile’ feel. As new websites are added, or new log entries are available, we wanted to make sure it was easy for developers to update that information. Given that goal, along with the quirks of our design (extension authors can’t write JavaScript that runs in the main window), Knockout turned out to be a fine choice. There are a few reasons we love Knockout:

  • Automatic refreshing of the UI - The data binding aspect of Knockout is pretty incredible. We make changes to underlying model objects in TypeScript, and the UI is updated for us.
  • The tooling is great. This is starting to be a recurring theme :) Visual Studio has some great tooling for Knockout data binding expressions (thanks Mads).
  • The binding syntax is pure - We’re not stuck putting invalid HTML in our code to support the specifics of the binding library. Everything is driven off of data-* attributes.

I’m sure there are 100 other reasons our dev team could come up with on why we love Knockout. Especially the ineffable Steve Sanderson, who joined our dev team to work on the project. He even gave an awesome talk on the subject at NDC:

What’s next

I’m really excited about the future of the portal. Since our first release at //build, we’ve been working on new features, and responding to a lot of the customer feedback. Either way - we really want to know what you think.


Switching from Wordpress to Jekyll

17 July 2013 Posted Under: jekyll [0] comments
 

jekyll is fun

Over the last few weeks, I’ve been slowly moving my blog from Wordpress to Jekyll. The change has been a long time coming, and so far I couldn’t be happier with the results. I thought it may be interesting to make the ultimate meta post, and write a blog post about my blog. You can take a look at the source code on GitHub.

What’s wrong with Wordpress?

In short? Absolutely nothing. I love Wordpress. I’ve been using it across multiple sites for years, I worked on a product that supported Wordpress development, I’ve even blogged here about speaking at WordCamp. The problem is that for me, the costs of a full featured blog engine outweigh the benefits.

Every damn time.

Let me give you an example. My post rate on this blog is atrocious. Part of the reason is that like most people I’m freakishly busy, but there’s another nagging reason - every time I sit down to write a post, I’m burdened with maintenance costs. On the few evenings I have the time or content to write a post, it would usually go like this:

9:00 PM - Kids are in bed. Time to sit down and write that blog post.
9:05 PM - I'm logged into the Wordpress admin site. Looks like I need an update. Better install it.
9:15 PM - Oh, I have some permissions error when I try to download. I'll do it manually.
9:35 PM - Alright, I backed up my database, downloaded the new Wordpress version and did a manual upgrade.
9:40 PM - My plugins are broken. Dammit.
9:45 PM - Updating my plugins causes another access denied error.
9:50 PM - I had to use putty and remember the flags for chmod. F-me.
10:00 PM - That was fun. I'm going to bed.

Running a Wordpress blog comes with a cost. You need to keep it updated. You need to find the right plugins, and keep those updated. You need to back up databases. You need to have a strategy for backing up changes to the theme. For someone that’s posting every week, these costs may be worth it. It just isn’t worth it to me.

Enter Jekyll

Jekyll takes a bit of a different approach to serving up a blog. Instead of the traditional model of hosting an active web application with PHP/Ruby/.NET/whatevs and a database, you simply post static pages. You write your posts in one of the supported markup languages (I use good ol’ HTML), and then write the jekyll build tool to generate your static HTML pages. There are around 100 posts on setting up jekyll, none better than the official documentation - so I won’t go too deep into how jekyll works. I’ll just share my setup.

Importing Wordpress

After playing around with the quick start guide, I got started by importing the Wordpress data to script out the first version of the site. The jekyll site has a great section on migrating from other blogs, so I mostly followed their steps.

First, I downloaded my wordpress.xml file from the Wordpress admin:

export

Next I ran the import tool:

gem install hpricot
ruby -rubygems -e 'require "jekyll/jekyll-import/wordpressdotcom";
    JekyllImport::WordpressDotCom.process({ :source => "wordpress.xml" })'

This downloaded all of my existing posts, and created new posts with metadata in jekyll format (woo!). What it didn’t do was download all of my images. To get around that, I just connected with my FTP client and downloaded my images directory into the root of my jekyll site.

Syntax Highlighting

One of the plugins I had installed on my Wordpress site was SyntaxHighlighter Evolved. Jekyll comes with a built in syntax highlighting sysyntax using Pygments and Liquid:

var logger = new winston.Logger({
  transports: [
    new winston.transports.Console(),
    new winston.transports.Skywriter({
      account: stName,
      key: stKey,
      partition: require("os").hostname() + ":" + process.pid,
    }),
  ],
});
logger.info("Started wazstagram backend");

That’s all well and good but - the syntax highlighter wasn’t quite as nice as I would like. I also didn’t feel the need to lock myself into liquid for something that can be handled on the client. I chose to use PrismJS, largely because I’ve used it in the past with success. Someone even wrote a fancy jekyll plugin to generate your highlighted markup at compile time, if that’s your thing.

–watch and livereload

As I worked on the site, I was making a lot of changes, rebuilding, waiting for the build to finish, and reloading the browser. To make some of this easier, I did a few things. Instead of saving my file, building, and running the server every time, you can just use the built in watch command:

jekyll serve --watch

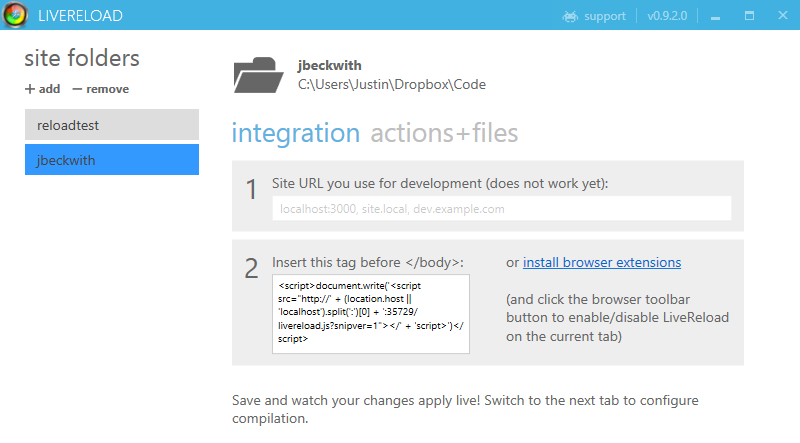
This will run the server, watch for changes, and perform a build anytime something is modified on disk. The other side to this is refreshing the browser automatically. To accomplish that, I used LiveReload with the Chrome browser plugin:

LiveReload refreshes the browser after a change

The OSX version of LiveReload lets you set a delay between noticing the change on the filesystem and refreshing the browser. You really want to set that to a second or two just to give jekyll enough time to compile the full site after the first change hits the disk.

RSS Feed

One of the pieces that isn’t baked into jekyll is the construction of an RSS feed. The good news is that someone already solved this problem. This repository has a few great examples.

Archive by Category

One of the pieces I wanted to add was a post archive page. Building this was relatively straight forward - you create a list of categories used across all of the posts in your site. Next you render an excerpt for each post:


<div class="container">
  <div id="home">
    <h1>The Archive</h1>
    <div class="hrbar"> </div>
    <div class="categories">
      {% for category in site.categories %}
      <span
        ><a href="#{{ category[0] }}"
          >{{ category[0] }} ({{ category[1].size }})</a
        ></span
      >
      <span class="dot"> </span>
      {% endfor %}
    </div>
    <div class="hrbar"> </div>
    <div class="all-posts">
      {% for category in site.categories %}
      <div>
        <a name="{{category[0]}}"></a>
        ### {{ category[0] }}
        <ul class="posts">
          {% for post in category[1] %}
          <li>
            <span>{{ post.date | date_to_string }}</span> »
            <a href="{{ post.url }}">{{ post.title }}</a>
          </li>
          {% endfor %}
        </ul>
      </div>
      {% endfor %}
    </div>
  </div>
</div>

For the full example, check it out on GitHub.

Disqus

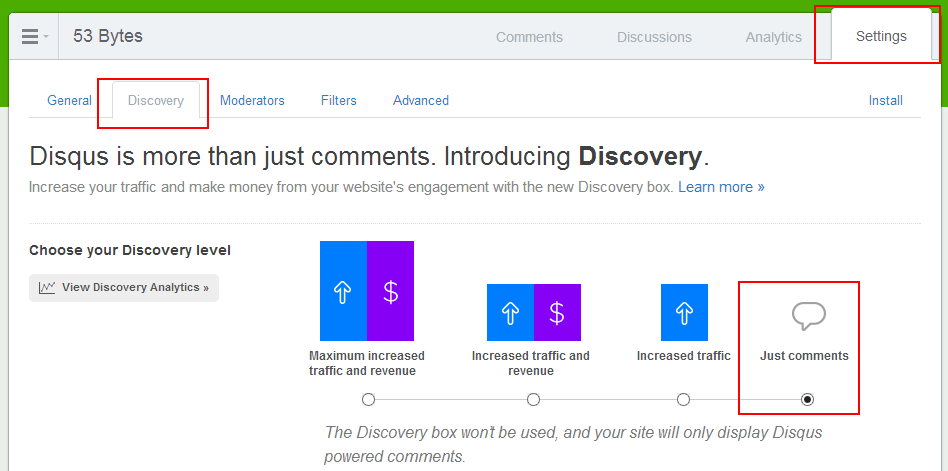
I used Disqus for my commenting and discussion engine. This probably isn’t news to anyone, but disqus is pretty awesome. Without a backend database to power user sign ups and comments, it’s easier to just hand this over to a third party service (and it’s free!). One tip though - disqus has a ‘discovery’ feature turned on by default. It shows a bunch of links I don’t want, and muddied up the comments. Here’s where you can turn it off:

turn off discovery under settings->discovery->Just comments

Backups

With no database, backing up means just backing up the files. Good news everyone! I’m just using good ol GitHub and a git repository to track changes and store my files. I keep local files in Dropbox just in case.

Hosting the bits

The coolest part of using Jekyll is that you can host your site on GitHub - for free. They build the site when you push changes, and even let you set up a custom domain.

What’s Next?

Now that I’ve got the basic workflow for the site rolling (hopefully with less maintenance costs), the next piece I’ll probably tackle is performance. Between Bootstrap, JQuery, and Prism I’m pushing a lot of JavaScript and CSS that should be bundled and minified. Until then, I’m just going to keep enjoying writing my posts in SublimeText and publishing with a git push. Let me know what you think!


Scalable realtime services with Node.js, Socket.IO and Windows Azure

30 January 2013 Posted Under: azure [0] comments
 

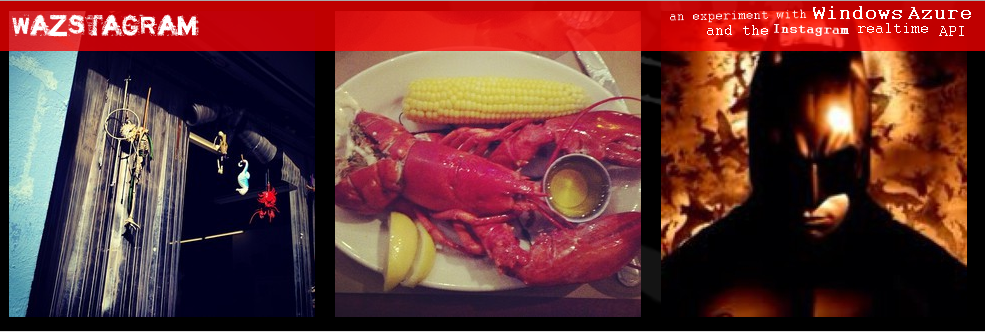
WAZSTAGRAM

Wazstagram is a fun experiment with node.js on Windows Azure and the Instagram Realtime API. The project uses various services in Windows Azure to create a scalable window into Instagram traffic across multiple cities.

The code I used to build WAZSTAGRAM is under an MIT license, so feel free to learn and re-use the code.

How does it work

The application is written in node.js, using cloud services in Windows Azure. A scalable set of backend nodes receive messages from the Instagram Realtime API. Those messages are sent to the front end nodes using Windows Azure Service Bus. The front end nodes are running node.js with express and socket.io.

WAZSTAGRAM Architecture

Websites, and Virtual Machines, and Cloud Services, Oh My

One of the first things you need to grok when using Windows Azure is the different options you have for your runtimes. Windows Azure supports three distinct models, which can be mixed and matched depending on what you’re trying to accomplish:

Websites

Websites in Windows Azure match a traditional PaaS model, when compared to something like Heroku or AppHarbor. They work with node.js, asp.net, and php. There is a free tier. You can use git to deploy, and they offer various scaling options. For an example of a real time node.js site that works well in the Website model, check out my TwitterMap example. I chose not to use Websites for this project because a.) websockets are currently not supported in our Website model, and b.) I want to be able to scale my back end processes independently of the front end processes. If you don’t have crazy enterprise architecture or scaling needs, Websites work great.

Virtual Machines

The Virtual Machine story in Windows Azure is pretty consistent with IaaS offerings in other clouds. You stand up a VM, you install an OS you like (yes, we support linux), and you take on the management of the host. This didn’t sound like a lot of fun to me because I can’t be trusted to install patches on my OS, and do other maintainency things.

Cloud Services

Cloud Services in Windows Azure are kind of a different animal. They provide a full Virtual Machine that is stateless - that means you never know when the VM is going to go away, and a new one will appear in it’s place. It’s interesting because it means you have to architect your app to not depend on stateful system resources pretty much from the start. It’s great for new apps that you’re writing to be scalable. The best part is that the OS is patched automagically, so there’s no OS maintenance. I chose this model because a.) we have some large scale needs, b.) we want separation of conerns with our worker nodes and web nodes, and c.) I can’t be bothered to maintain my own VMs.

Getting Started

After picking your runtime model, the next thing you’ll need is some tools. Before we move ahead, you’ll need to sign up for an account. Next, get the command line tools. Windows Azure is a little different because we support two types of command line tools:

  • PowerShell Cmdlets: these are great if you’re on Windows and dig the PowerShell thing.
  • X-Platform CLI: this tool is interesting because it’s written in node, and is available as a node module. You can actually just npm install -g azure-cli and start using this right away. It looks awesome, though I wish they had kept the flames that were in the first version.

X-Plat CLI

For this project, I chose to use the PowerShell cmdlets. I went down this path because the Cloud Services stuff is not currently supported by the X-Platform CLI (I’m hoping this changes). If you’re on MacOS and want to use Cloud Services, you should check out git-azure. To bootstrap the project, I pretty much followed the ‘Build a Node.js Chat Application with Socket.IO on a Windows Azure Cloud Service’ tutorial. This will get all of your scaffolding set up.

My node.js editor - WebMatrix 2

After using the PowerShell cmdlets to scaffold my site, I used Microsoft WebMatrix to do the majority of the work. I am very biased towards WebMatrix, as I helped build the node.js experience in it last year. In a nutshell, it’s rad because it has a lot of good editors, and just works. Oh, and it has IntelliSense for everything:

I <3 WebMatrix

Install the Windows Azure NPM module

The azure npm module provides the basis for all of the Windows Azure stuff we’re going to do with node.js. It includes all of the support for using blobs, tables, service bus, and service management. It’s even open source. To get it, you just need to cd into the directory you’re using and run this command:

npm install azure

After you have the azure module, you’re ready to rock.

The Backend

The backend part of this project is a worker role that accepts HTTP Post messages from the Instagram API. The idea is that their API batches messages, and sends them to an endpoint you define. Here’s some details on how their API works. I chose to use express to build out the backend routes, because it’s convenient. There are a few pieces to the backend that are interesting:

Use nconf to store secrets. Look at the .gitignore

If you’re going to build a site like this, you are going to need to store a few secrets. The backend includes things like the Instagram API key, my Windows Azure Storage account key, and my Service Bus keys. I create a keys.json file to store this, though you could add it to the environment. I include an example of this file with the project. DO NOT CHECK THIS FILE INTO GITHUB! Seriously, don’t do that. Also, pay close attention to my .gitignore file. You don’t want to check in any .cspkg or.csx files, as they contain archived versions of your site that are generated while running the emulator and deploying. Those archives contain your keys.json file. That having been said - nconf does makes it really easy to read stuff from your config:

// read in keys and secrets
nconf.argv().env().file("keys.json");
var sbNamespace = nconf.get("AZURE_SERVICEBUS_NAMESPACE");
var sbKey = nconf.get("AZURE_SERVICEBUS_ACCESS_KEY");
var stName = nconf.get("AZURE_STORAGE_NAME");
var stKey = nconf.get("AZURE_STORAGE_KEY");
Use winston and winston-skywriter for logging

The cloud presents some challenges at times. Like how do I get console output when something goes wrong. Every node.js project I start these days, I just use winston from the get go. It’s awesome because it lets you pick where your console output and logging gets stored. I like to just pipe the output to console at dev time, and write to Table Storage in production. Here’s how you set it up:

// set up a single instance of a winston logger, writing to azure table storage
var logger = new winston.Logger({
  transports: [
    new winston.transports.Console(),
    new winston.transports.Skywriter({
      account: stName,
      key: stKey,
      partition: require("os").hostname() + ":" + process.pid,
    }),
  ],
});

logger.info("Started wazstagram backend");
Use Service Bus - it’s pub/sub (+) a basket of kittens

Service Bus is Windows Azure’s swiss army knife of messaging. I usually use it in the places where I would otherwise use the PubSub features of Redis. It does all kinds of neat things like PubSub, Durable Queues, and more recently Notification Hubs. I use the topic subscription model to create a single channel for messages. Each worker node publishes messages to a single topic. Each web node creates a subscription to that topic, and polls for messages. There’s great support for Service Bus in the Windows Azure Node.js SDK.

To get the basic implementation set up, just follow the Service Bus Node.js guide. The interesting part of my use of Service Bus is the subscription clean up. Each new front end node that connects to the topic creates it’s own subscription. As we scale out and add a new front end node, it creates another subscription. This is a durable object in Service bus that hangs around after the connection from one end goes away (this is a feature). To make sure sure you don’t leave random subscriptions lying around, you need to do a little cleanup:

function cleanUpSubscriptions() {
    logger.info('cleaning up subscriptions...');
    serviceBusService.listSubscriptions(topicName, function (error, subs, response) {
        if (!error) {
            logger.info('found ' + subs.length + ' subscriptions');
            for (var i = 0; i &lt; subs.length; i++) {
                // if there are more than 100 messages on the subscription, assume the edge node is down
                if (subs[i].MessageCount &gt; 100) {
                    logger.info('deleting subscription ' + subs[i].SubscriptionName);
                    serviceBusService.deleteSubscription(topicName, subs[i].SubscriptionName, function (error, response) {
                        if (error) {
                            logger.error('error deleting subscription', error);
                        }
                    });
                }
            }
        } else {
            logger.error('error getting topic subscriptions', error);
        }
        setTimeout(cleanUpSubscriptions, 60000);
    });
}
The NewImage endpoint

All of the stuff above is great, but it doesn’t cover what happens when the Instagram API actually hits our endpoint. The route that accepts this request gets metadata for each image, and pushes it through the Service Bus topic:

serviceBusService.sendTopicMessage("wazages", message, function (error) {
  if (error) {
    logger.error("error sending message to topic!", error);
  } else {
    logger.info("message sent!");
  }
});

The Frontend

The frontend part of this project is (despite my ‘web node’ reference) a worker role that accepts accepts the incoming traffic from end users on the site. I chose to use worker roles because I wanted to take advantage of Web Sockets. At the moment, Cloud Services Web Roles do not provide that functionality. I could stand up a VM with Windows Server 8 and IIS 8, but see my aformentioned anxiety about managing my own VMs. The worker roles use socket.io and express to provide the web site experience. The front end uses the same NPM modules as the backend: express, winston, winston-skywriter, nconf, and azure. In addition to that, it uses socket.io and ejs to handle the client stuff. There are a few pieces to the frontend that are interesting:

Setting up socket.io

Socket.io provides the web socket (or xhr) interface that we’re going to use to stream images to the client. When a user initially visits the page, they are going to send a setCity call, that lets us know the city to which they want to subscribe (by default all cities in the system are returned). From there, the user will be sent an initial blast of images that are cached on the server. Otherwise, you wouldn’t see images right away:

// set up socket.io to establish a new connection with each client
var io = require('socket.io').listen(server);
io.sockets.on('connection', function (socket) {
    socket.on('setCity', function (data) {
        logger.info('new connection: ' + data.city);
        if (picCache[data.city]) {
            for (var i = 0; i &lt; picCache[data.city].length; i++) {
                socket.emit('newPic', picCache[data.city][i]);
            }
        }
        socket.join(data.city);
    });
});

Creating a Service Bus Subscription

To receive messages from the worker nodes, we need to create a single subscription for each front end node process. This is going to create subscription, and start listening for messages:

// create the initial subscription to get events from service bus
serviceBusService.createSubscription(
  topicName,
  subscriptionId,
  function (error) {
    if (error) {
      logger.error("error creating subscription", error);
      throw error;
    } else {
      getFromTheBus();
    }
  },
);

Moving data between Service Bus and Socket.IO

As data comes in through the service bus subscription, you need to pipe it up to the appropriate connected clients. Pay special attention to io.sockets.in(body.city) - when the user joined the page, they selected a city. This call grabs all users subscribed to that city. The other important thing to notice here is the way getFromTheBus calls itself in a loop. There’s currently no way to say "just raise an event when there’s data" with the Service Bus Node.js implementation, so you need to use this model.

function getFromTheBus() {
  try {
    serviceBusService.receiveSubscriptionMessage(topicName, subscriptionId, { timeoutIntervalInS: 5 }, function (error, message) {
        if (error) {
            if (error == &quot;No messages to receive&quot;) {
                logger.info('no messages...');
            } else {
                logger.error('error receiving subscription message', error)
            }
        } else {
            var body = JSON.parse(message.body);
            logger.info('new pic published from: ' + body.city);
            cachePic(body.pic, body.city);
            io.sockets. in (body.city).emit('newPic', body.pic);
            io.sockets. in (universe).emit('newPic', body.pic);
        }
        getFromTheBus();
    });
  } catch (e) {
    // if something goes wrong, wait a little and reconnect
    logger.error('error getting data from service bus' + e);
    setTimeout(getFromTheBus, 1000);
  }
}

Learning

The whole point of writing this code for me was to explore building performant apps that used a rate limited API for data. Hopefully this model can effectively be used to accept data from any API responsibly, and scale it out to a number of connected clients to a single service. If you have any ideas on how to make this app better, please let me know, or submit a PR!

Questions?

If you have any questions, feel free to submit an issue here, or find me @JustinBeckwith


5 steps to a better Windows command line

28 November 2012 Posted Under: tools [0] comments
 

Better command line

I spend a lot of time at the command line. As someone who likes to code on OSX and Windows, I’ve always been annoyed by the Windows command line experience. Do I use cmd, or PowerShell? Where are my tabs? What about package management? What about little frivolous things like being able to resize the window. I’ve finally got my Windows command line experience running smoothly, and wanted to share my setup. Here are my 5 steps to a Windows command line that doesn’t suck.

1. Use Console2 or ConEmu

The first place to start is the actual console application. Scott Hanselman wrote an excellent blog post on setting up Console2, and I’ve been using it ever since. It adds tabs, a resizable window, transparency, and the ability to run multiple shells. I choose to run PowerShell (you should too, keep listening). There are other options out there, but I’ve really grown to love Console2.

Console2

2. Use PowerShell

I won’t spend a ton of time evangelizing PowerShell. There are a few good reasons to dump cmd.exe and move over:

  • Most of the things you do in cmd will just work. There are obviously some exceptions, but for the better part all of the things I want to do in cmd are easily done in PowerShell.
  • Tab Completion and Get-Help is awesome. PowerShell does a great job of making things discoverable as you learn.
  • It’s a sane scripting tool. If you’ve ever tried to do anything significant in a batch script, I’m sorry. You can even create your own modules and cmdlets using managed code, if that’s your thing.
  • Microsoft is releasing a lot of stuff built on PowerShell. Most of the new stuff we release is going to have great PowerShell support, including Windows Azure.
  • It’s a growing community. Sites like PowerShell.org and PsGet provide a great place to ask questions and look at work others have done.

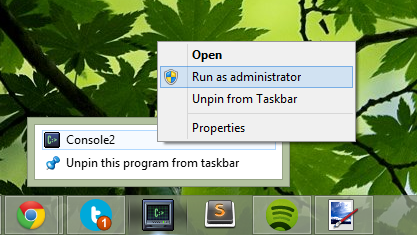
Now that I’ve sold you, there are a few things you’ll find through here that make using PowerShell a bit easier. To use this stuff, you’re going to want to set an execution policy in PowerShell that lets you run custom scripts. By default, the execution of PS scripts is disabled, but it’s kind of necessary to do anything interesting. I lead a wild and dangerous life, so I use an unrestricted policy. To set your policy, first run Console2 (or PowerShell) as an administrator:

Run as administrator

Next, use the Set-ExecutionPolicy command. Note, this means any un-signed script can be run on your system, if you run it, and many people choose to use RemoteSigned. Here is the official doc on Set-ExecutionPolicy.

Set-ExecutionPolicy Unrestricted

Set execution policy

Now you’re ready to start doing something interesting.

3. Use the Chocolatey package manager

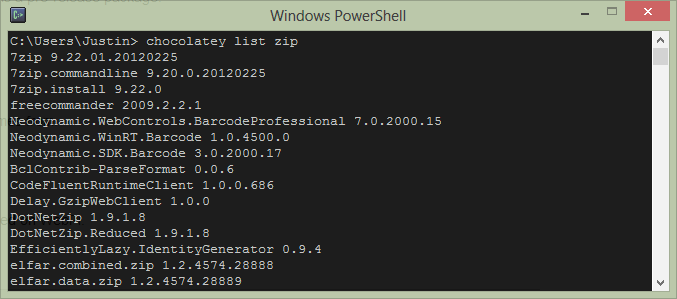
Spending a lot of time in Ubuntu and OSX, I got really used to sudo apt-get install <package> and `brew install `. The closest I’ve found to that experience on Windows is the Chocolatey package manager. Chocolatey has all of the packages you would expect to find on a developer’s machine:

list packages

To install Chocolatey, just run cmd.exe and run the following command (minus the c:> part):

C:\> @powershell -NoProfile -ExecutionPolicy unrestricted -Command "iex ((new-object net.webclient).DownloadString('http://bit.ly/psChocInstall'))" && SET PATH=%PATH%;%systemdrive%\chocolatey\bin

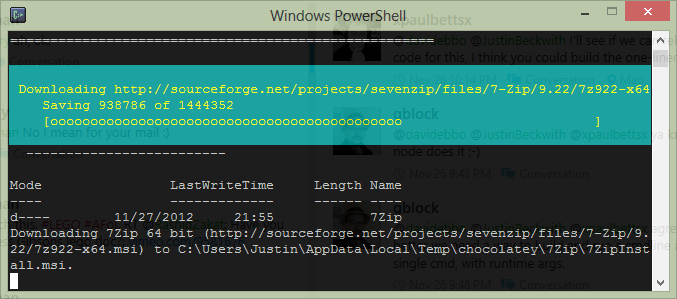
And you’re ready to rock. If you want to install something like 7zip, you can use the cinst command:

cinst 7zip

install 7zip

4. Use an alias for SublimeText

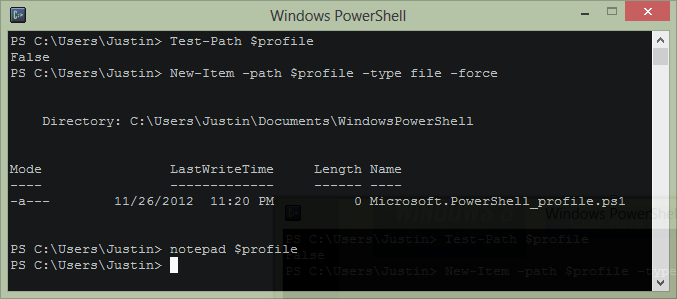
This seems kind of trivial, but one of the things I’ve really missed on Windows is the default shortcut to launch SublimeText, subl. I use my PowerShell profile to create an alias to SublimeText.exe, which allows me to subl file.txt or subl . just like I would from OSX. This article gives a basic overview on how to customize your PowerShell Profile; it’s really easy to follow, so I won’t go into re-creating the steps.

edit profile

After you’ve got your PowerShell profile created, edit the script, and add this line:

Set-Alias subl 'C:\Program Files\Sublime Text 2\sublime_text.exe'

Save your profile, and spin up a new PowerShell tab in Console2 to reload the session. Go to a directory that contains some code, and try to open it:

subl .

This will load the current directory as a project in SublimeText from the command line. Small thing, but a nice thing.

5. Use PsGet and Posh-Git

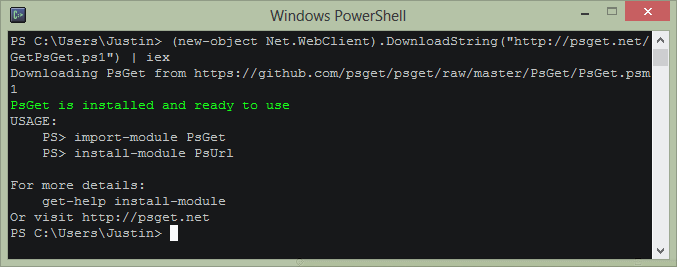
One of the nice things about using PowerShell over cmd is the community that’s starting to emerge. There are a ton of really useful tools and cmdlets that others have already written, and the easiest way to get at most of these is to use PsGet. PsGet provides a super easy way to install PowerShell modules that extend the basic functionality of the shell, and provide other useful libraries. To install PsGet, run the following command from a PowerShell console:

(new-object Net.WebClient).DownloadString(&quot;http://psget.net/GetPsGet.ps1&quot;) | iex

If you get an error complaining about executing scripts, you need to go back to #2. Immediately, we can start using the Install-Module command to start adding functionality to our console.

Install PsGet

The first module that led me to PsGet is a package that adds status and tab completion to git. Phil Haack did a great write up on setting up posh-git, and I’ve since discovered a few other cool things in the PsGet gallery. Installing Posh-Git is pretty straight forward:

Install Posh-Git

The first nice thing here is that I now have command completion. As I type git sta and hit <tab>, it will be completed to git status. Some tools like posh-npm will even search the npm registry for packages using tab completion. The other cool thing you get with this module is the status of your repository right in the prompt:

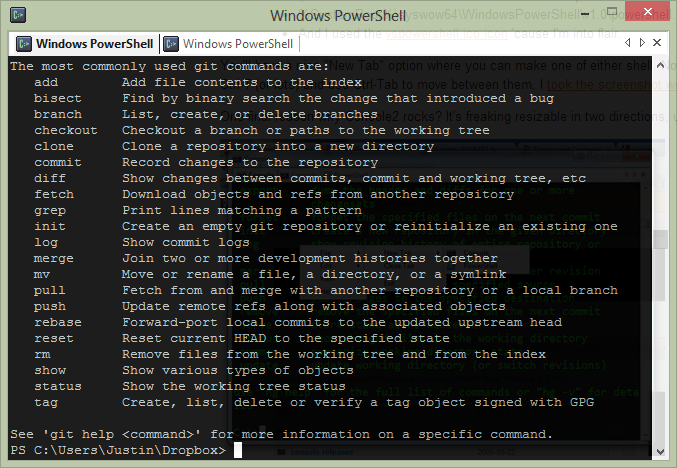
posh git

Wrapping up

These are just the ways I know how to make the command line experience better. If any one else has some tips, I’d love to hear them!


WebMatrix and Node Package Manager

07 September 2012 Posted Under: WebMatrix [0] comments
 

NPM and WebMatrix

A few months ago, we introduced the new node.js features we’ve added to WebMatrix 2. One of the missing pieces from that experience was a way to manage NPM (Node Package Manager) from within the IDE.

This week we shipped the final release of WebMatrix 2, and one of the fun things that comes with it is a new extension for managing NPM. For a more complete overview of the WebMatrix 2, check out Vishal Joshi’s blog post.

If you want to skip all of this and just download the bits, here you go:

image

Installing the Extension

The NPM extension can be installed using the extension gallery inside of WebMatrix. To get started, go ahead and create a new node site with express using the built in template:

Create a new express site

After you create the site, click on the ‘Extensions’ button in the ribbon:

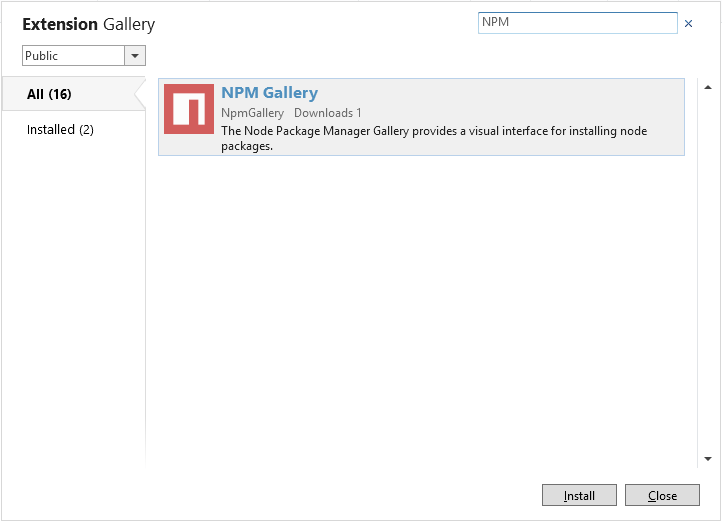
WebMatrix Extension Gallery

Search for ‘NPM’, and click through the wizard to finish installing the extension:

Install the NPM Gallery Extension

Now when you navigate to the files workspace, you should see the new NPM icon in the ribbon.

Managing Packages

While you’re working with node.js sites, the icon should always show up. To get started, click on the new icon in the ribbon:

NPM Icon in the ribbon

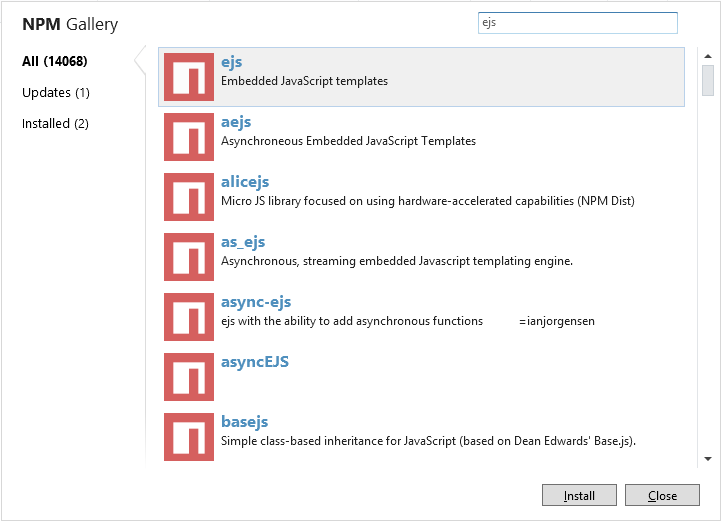
This will load a window very similar to the other galleries in WebMatrix. From here you can search for packages, install, uninstall, update, any of the basic tasks you’re likely to do day to day with npm.

NPM Gallery

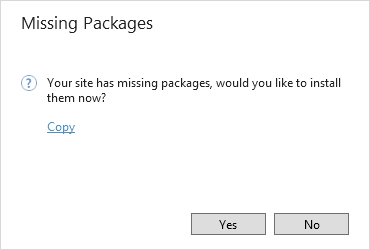
When you open up a new site, we also check your package.json to see if you’re missing any dependencies:

Missing NPM packages

We’re just getting started with the node tools inside of WebMatrix, so if you have anything else you would like to see added please hit us up over at UserVoice.

More Information

If you would like some more information to help you get started, check out some of these links:

Happy Coding