
Over this holiday break I had the interesting opportunity to write a bookmarklet for a friend who runs a comic based website. Instead of just manipulating the currently loaded page, the bookmarklet needed to send a list of images to another site. Often when writing bookmarklets, we tend to only think of loading our code in the context of a HTML content page. How often do you test your bookmarklets when the browser is viewing an image? In this article I am going to go through the code I used to bootstrap my bookmarklet script, and discuss some of the interesting challenges I experienced along the way.
To get started with this code, I used a fantastic article by Tommy Saylor of Smashing Magazine. It gave me a good start, but certainly left a lot of details out, and in my case, caused a lot of bugs.
Bookmarklet Architecture
That’s right: we should talk about architecture before diving right into our JavaScript. When writing a bookmarklet, it’s generally a good idea to keep as much code out of the actual bookmark as possible. This is where ‘bootstrapping’ comes into play: we will simply use our bookmark as a piece of code that actually loads the core bits of our JavaScript. There are actually two reasons why this is a good idea:
- Different browsers have various max-lengths of bookmarks. Keep in mind that a bookmarklet is kind of an accidental feature. I think the average max length works out to around 2000 characters, but some browsers (like Internet Explorer 6) have limits as low as 508 characters.
- Users are unlikely to be bothered into refreshing your bookmarklet. Once somebody bookmarks your code, how are they going to get updates? It’s much easier if your bookmarklet simply loads a JavaScript file from a static URL. This way we can update the code in the back whenever we want.
After our bootstrapper loads the script we created, any external libraries will be loaded. For example, I used jQuery and jQuery UI for my most recent project. After the dependencies are loaded, we will then execute our main code.
Another thing to keep in mind when you’re building your bookmarklet is how the site behaves after the function is disabled. For example, if your bookmarklet gives all images on the site a red border, what happens when the user no longer wishes to use the bookmarklet? For this reason, I tend to create a cleanup method that allows our bookmarklet changes to be undone, and leaves the script in a state that can later be used again.
The bootstrap code
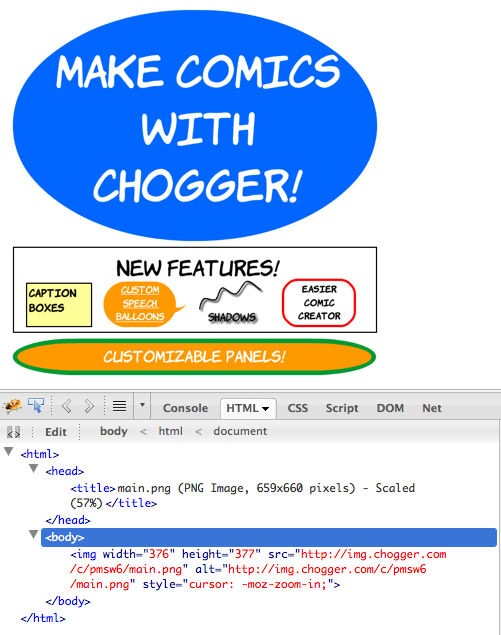
For the purposes of this bookmarklet, I needed to write a piece of code that would interact with a standard HTML page and it’s images, or interact with a page that was a single loaded image. For that reason, the first thing we need to do is determine what type of page we’re dealing with. If the page is HTML, we can insert a script. If the page is an image, we need to behave differently. While I found that Firefox and WebKit both generated a HTML container to render image pages, their behavior surrounding script events of these pages were too inconsistent to be depended upon.
Here is a formatted example of what my a href tag JavaScript looks like:
// <a> tag href javascript
javascript: (function () {
  if (
    (document.contentType && document.contentType.indexOf("image/") > -1) ||
    /.png$/.test(location.href) ||
    /.jpg$/.test(location.href) ||
    /.jpeg$/.test(location.href) ||
    /.gif$/.test(location.href)
  ) {
    location.href = "https://jbeckwith.com/bookmarklet/";
  } else if (!window.main) {
    document.body.appendChild(document.createElement("script")).src =
      "https://jbeckwith.com/my-bookmarklet.js";
  } else {
    main();
  }
})();
After tidying up our script, and adding the surrounding tag, here is a final rendered output of our code, I came up with the following:
<!--
	<a> tag example
-->
<a
  href="javascript:(function(){if((document.contentType&&document.contentType.indexOf('image/')>-1)||/.png$/.test(location.href)||/.jpg$/.test(location.href)||/.jpeg$/.test(location.href)||/.gif$/.test(location.href)){location.href='https://jbeckwith.com/bookmarklet/';}else if(!window.main){document.body.appendChild(document.createElement('script')).src='https://jbeckwith.com/my-bookmarklet.js';}else{main();}})();"
  >It's a bookmarklet!</a
>
Loading jQuery and jQueryUI
Now that the bootstrapper is created, I am going to focus the rest of the article on the external JavaScript file that contains the meat of the code. With the script I wrote, I needed to use a good deal of visual effects. I am already comfortable with JQuery, so I chose to use it as my JavaScript framework:
// create javascript libraries required for main
if (typeof jQuery == "undefined") {
  // include jquery
  var jQ = document.createElement("script");
  jQ.type = "text/javascript";
  jQ.onload = getDependencies;
  jQ.onreadystatechange = function () {
    if (this.readyState == "loaded" || this.readyState == "complete") {
      getDependencies();
    } // end if
  };
  jQ.src = "https://ajax.googleapis.com/ajax/libs/jquery/1/jquery.min.js";
  document.body.appendChild(jQ);
} // end if
else {
  getDependencies();
} // end else
If you look at the example in the Smashing Magazine article, you will notice a couple of differences. We need to add an event for onreadystatechange to handle Internet Explorer. I found that IE inconsistently set the readyState of the script object to ‘loaded’ or ‘complete’ in various parts of the DOM, so as a rule I check for both. If you don’t make this change, IE will never notify the script that jQuery is finished loading.
Secondly, I have added the getDependencies() method to manage loading required scripts (in addition to jQuery). Since I am depending heavily on a few jQuery UI components, I needed to load both an external JavaScript file and an external CSS file:
function getDependencies() {
  // make sure jqueryUI is loaded
  if (!jQuery.ui) {
    // get the link css tag
    var jQCSS = document.createElement("link");
    jQCSS.type = "text/css";
    jQCSS.rel = "stylesheet";
    jQCSS.href =
      "https://ajax.googleapis.com/ajax/libs/jqueryui/1.8/themes/base/jquery-ui.css";
    document.body.appendChild(jQCSS);

    // grab jquery ui
    var jQUI = document.createElement("script");
    jQUI.type = "text/javascript";
    jQUI.src =
      "https://ajax.googleapis.com/ajax/libs/jqueryui/1.8.7/jquery-ui.min.js";
    jQUI.onload = getDependencies;
    jQUI.onreadystatechange = function () {
      if (this.readyState == "loaded" || this.readyState == "complete") {
        getDependencies();
      } // end if
    };
    document.body.appendChild(jQUI);
  } // end if
  else {
    main();
  } // end else
} // end getDependencies function
In this case, I’m really only waiting on jQuery and jQuery UI to load. If there were more dependent scripts, I would likely create an array of scripts that need to be loaded, and check all of their completion every turn through the getDepenencies method.
Embedding Styles
With the supporting code written, we’re now ready to work on our main method. This is where bookmarklets really are different based on your task. In my case, I’m creating a visual element on the page, complete with styles to match the target site. This works pretty much as expected, with a single caveat: any style definitions you create must be at the very bottom of your appended script. Internet Explorer has a nasty habit of inconsistently handling styles and scripts when appended to the DOM. For some reason beyond my understanding, appended style definitions, whether via script or ajax calls, only work if they are at the very bottom of the appended code. This is fantastically fun to figure out on your own, so hopefully I’ve saved you some trouble.
function main() {
 // only do this the first time the bar is loaded on the page
 if ($("#myBar").length == 0) {
  // append the styles and bar

  var barHtml = "<div id='myBar'>\
       <div id='myBar-main' class='dragOff'>\
        <span id='myBar-thumbs'></span>\
        <span id='myBar-text'>drag images to the mainbar</span>\
        <span id='myBar-buttons'>\
         <a href='#' id='doneLink'>done</a>\
         <a href='#' id='cancelLink'>cancel</a>\
        </span>\
       </div>\
      </div>\
      <style type='text/css'>\
        #myBar {color: #FFFFFF; font-size: 130%; font-weight: bold; left: 0; position: fixed; text-align: center; top: 0; width: 100%; z-index: 99998; display: none; }\
        #myBar-main {border-bottom: 3px solid #000000; padding: 7px 0;}\
        #myBar-buttons { display: block; float: right; margin-right: 20px; }\
        #myBar-buttons a,\
        #myBar-buttons a:visited,\
        #myBar-buttons a:link,\
        #myBar-buttons a:active,\
        #myBar-buttons a:hover\
         { padding: 4px; font-size: 0.7em; border: 2px solid #008600; background-color: #00cb00; color: #FFFFFF; text-decoration: none; }\
        #myBar-thumbs img { padding-left: 2px; padding-right: 2px; cursor: hand; }\
        .my-hover { border: 3px solid #4476b8 }\
        .dragOff { background-color: #4476b8; }\
        .dropHover{background-color: #FF0000; border: 1px dashed #e5a8a8;}\
        .dragActive {background-color: #759fd6}\
        .dropHighlight{border: 1px solid #000000;}\
        .dragHelper {z-index: 99999; border: 1px solid #000000;}\
       </style>";
  $("body").append(barHtml);
This code simply creates a formatted div and adds it to the top of the page.
Cleaning up the mess
If you look at the generated HTML above, you’ll notice that I include a cancel link. I like to give the user the option to cancel out of using the current bookmarklet, and even relaunch the bookmarklet without issue. So when you’re done, make sure to test closing and re-launching the code. I suggest keeping all of your elements on the page, and simply hiding them from the user:
// myBar close evnet
$("#cancelLink").click(function (e) {
  // hide the bar
  $("#myBar").fadeOut(750);

  // remove any img classes or handlers
  $("img").removeClass("my-hover").unbind().draggable("destroy");

  // reset the thumbnail span
  $("#myBar-thumbs").html("");

  // reset the text
  $("#myBar-text").html("drag images to the mybar");
});
And for now, that’s it. For the source to this project, visit my GitHub.