
Welcome to the first part in a multi-part series on building Adobe Flex projects using The Apache Ant Project.
So why would we want to use ant to build our flex projects? Flash Builder does a great job of building our actionscript and mxml. But it does not do a great job of integrating into our existing automated build frameworks. For those of us who have been writing Java in an enterprise environment, Ant is common knowledge. If you’ve spent any time working with the Microsoft .NET platform, you may have been exposed to NAnt or MSBuild The idea is that we need to have a reliable, repeatable build process that can execute outside of the context of our development environment. For my team, this means an independent build server (in my case, a virtual machine). An independent build server means nightly builds, and software that can run without the user at the keys.
Before we get started, I think it’s a good idea to run through the list of tools I’m using for this article:
- Apache Ant - v.1.8.1
- Flash Builder - v.4.0.1
- Flex SDK - v.3.5.0, v.4.1.0
So lets get started!
Download, Install, and Configure Ant
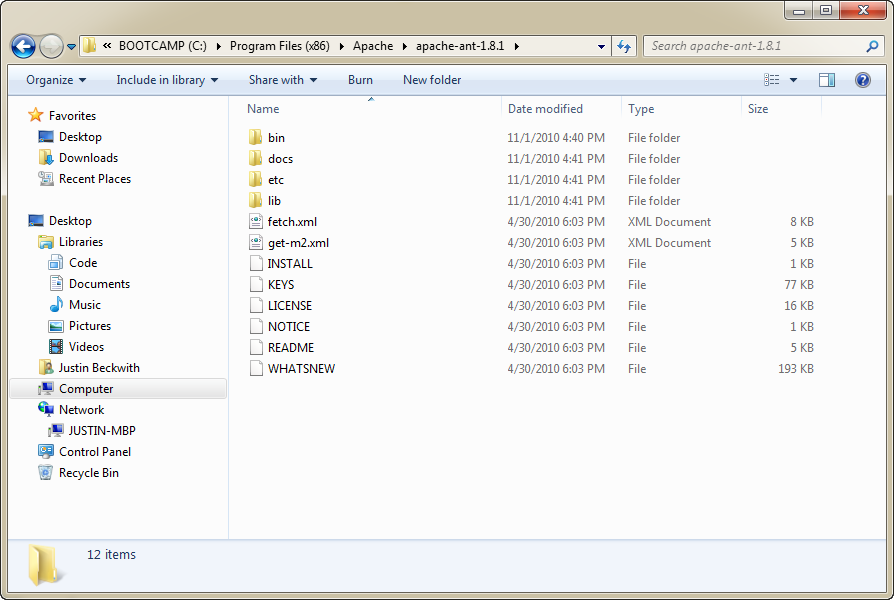
The first step is to download ant. At the time of this article, you can download the binaries at https://ant.apache.org/bindownload.cgi. The binaries are included as a *.zip file, so we need to unpackage our tool in a place that makes sense. I chose to create a directory structure that was consistent with other installed software on my system:
C:\Program Files (x86)\Apache\apache-ant-1.8.1
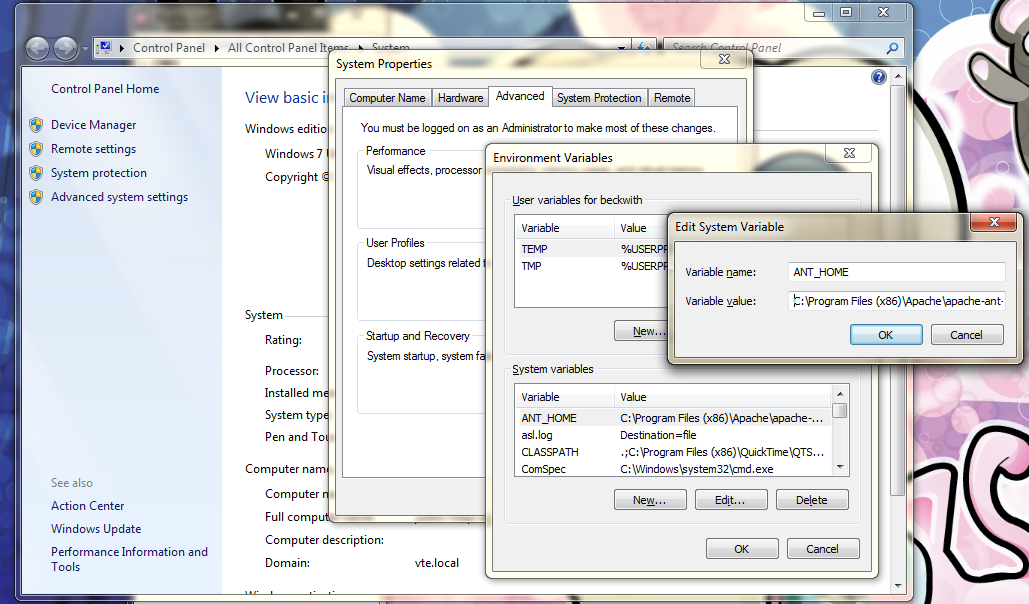
After Ant is installed in the appropriate location for your system, you need to create/modify a few system variables in order to use it. Start by right clicking on ‘Computer’, and navigate to ‘Properties’. Click on the ‘Advanced System Settings’ option, and then click on the ‘Environment Variables’ button.
The variable you need to create is ANT_HOME. Under system variables, click on the ‘New…’ button. Enter the name ANT_HOME, and enter the path you used to install Ant. For me, this is ‘C:\Program Files (x86)\Apache\apache-ant-1.8.1’:
We also need to modify the PATH variable, which will allow us to invoke Ant from the command line. Find the PATH variable in your system variables, and choose ‘Edit…’. At the end of the existing property value, add the full path to your Ant installation, with the addition of the bin. For me, this is ‘C:\Program Files (x86)\Apache\apache-ant-1.8.1\bin;’. We are now ready to use Ant.
Configuring The Flex SDK
For the purposes of this post, I am going to assume that you’ve already installed Flash Builder. In order for Ant to find the Flex SDK, we need to create an environment variable that points to the appropriate location. Instead of creating an environment variable that points to a specific SDK directory, I like to create a variable that points to the root of all SDKs. This allows us to choose the appropriate SDK version inside of the build file, and allows for building bits that use various SDK versions easily. Create a new environment variable named FLEX_HOME. Set the path to the root of your Flex SDK installations; for me this is: ‘C:\Program Files (x86)\Adobe\Adobe Flash Builder 4\sdks’. In the case of an independent build machine, you can install the Flex SDKs you need to use independent of Flash Builder.
Configuring Flash Builder to Invoke Ant (optional)
Generally, I invoke my Ant scripts from the command line. If you’re working from a development machine, you may choose to configure Flash Builder to invoke your Ant scripts directly from the IDE. To get this working, I followed the tutorial listed here:
To enable Ant from Flash Builder, use the following steps:
- Go to Help > Install New Software
- Click on Available Software Sites
- Click on ‘Add..’
- Type in: Name: Galileo
- Location: https://download.eclipse.org/releases/galileo/
- Go back to Help > Install New Software
- Select Galileo from the drop down:
- Wait until the List gets populated. It might take a long time!
- Type in ‘Eclipse Java’ in the search box to narrow down the search
- Select Eclipse Java Development Tools
- Click on Next
- Accept the Terms and click on Finish
- Click on Yes to restart FB4 and apply your changes:
- Go To Window> Other Views
- Select Ant and click OK
These steps will allow you to build your project in Flash Builder using Ant. Now our environment is set up and configured. In the next part of this series, I will go over how to write your Ant scripts.